Difference between revisions of "Chronomotion"
From apertus wiki
| Line 10: | Line 10: | ||
= Chronomotion Usage Details = | = Chronomotion Usage Details = | ||
== Establishing a Connection == | |||
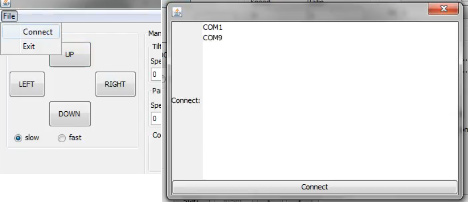
[[File:Connect.jpg]] | |||
Go to: | |||
File->Connect | |||
Select a COM port (in my case COM9 is the USB Serial adapter) and press the "Connect" Button. | |||
You should see Serial commands being sent and received in Terminal. This means everything connected properly and you can use all other buttons/commands. | You should see Serial commands being sent and received in Terminal. This means everything connected properly and you can use all other buttons/commands. | ||
| Line 17: | Line 24: | ||
==For Developers== | ==For Developers== | ||
https://gitorious.org/apertus/chronomotion | https://gitorious.org/apertus/chronomotion | ||
[[Chronomotion Compile Guide]] | [[Chronomotion Compile Guide]] | ||
Revision as of 13:26, 28 March 2013
Chronomotion Website: http://www.apertus.org/en/chronomotion
1 Requirements
- Merlin/Orion/Skywatcher remote head
- Computer/Laptop able to run JAVA
- Serial cable with TTL voltage level converter (plus USB to Serial converter) to connect Merlin/Orion/Skywatcher remote head to your computer
2 Installation
Chronomotion Installation Guide
3 Chronomotion Usage Details
3.1 Establishing a Connection
Go to:
File->Connect
Select a COM port (in my case COM9 is the USB Serial adapter) and press the "Connect" Button.
You should see Serial commands being sent and received in Terminal. This means everything connected properly and you can use all other buttons/commands.
