AXIOM Beta/Raw Recording
1 Overview
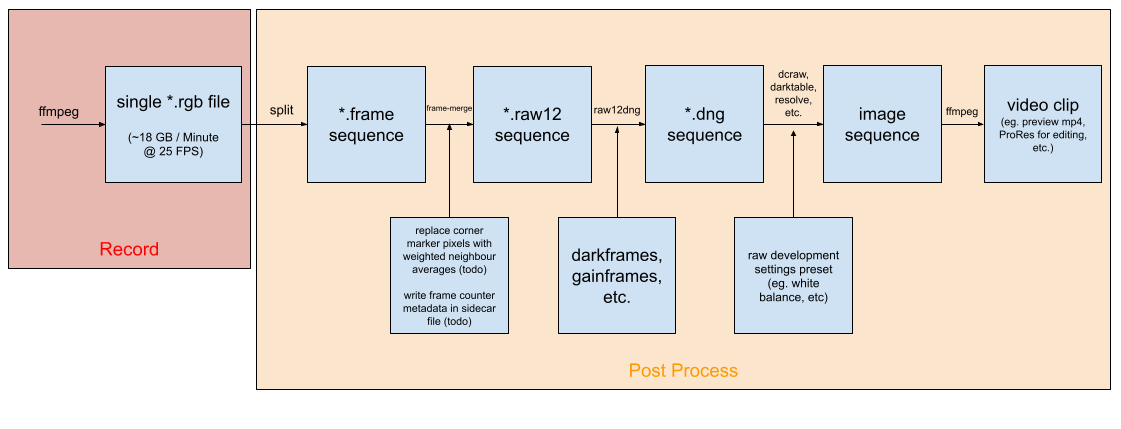
Simplified: The AXIOM Recorder is a small computer connected to the AXIOM Beta via HDMI, we use the HDMI video stream to transport our own custom raw image data from the camera. This stream needs to be repacked or post processed on the AXIOM Recorder to acquire the actual raw image sequence (RAW12 sequence). First software prototypes did this after recording, newer versions do it on-the-fly while recording.
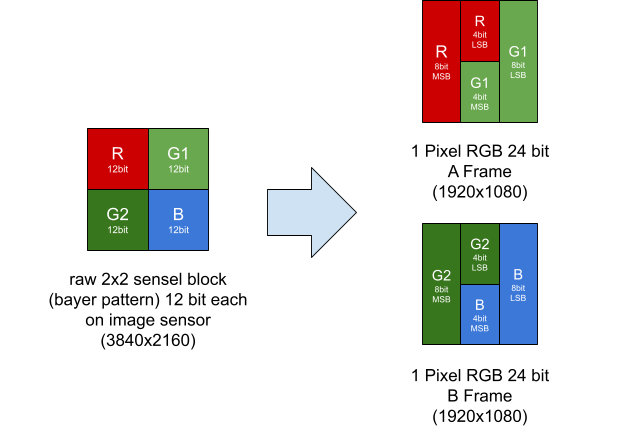
Technical: On the AXIOM Beta we utilize a Full HD (1920 x 1080) HDMI output stream with twice the frame-rate to store 4 pixels (12 bit each) from the image sensor (sensels) in 2 RGB pixels (24 bit each) in the HDMI stream. After recording this data through a HDMI capture device like the Magewell HDMI USB3 Gen 2 on a PC, Laptop or Single Board Computer (SBC) the data needs to be post processed to obtain the original raw data from the image sensor again. The two HDMI images from a single raw image are called A-Frame and B-Frame.
2 Recording Principle
3 Pixel Packing V3 Structure
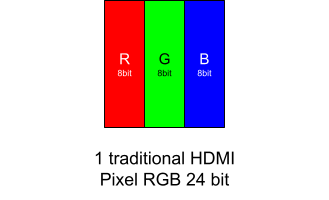
Traditional HDMI signal:
AXIOM Beta raw mode output:
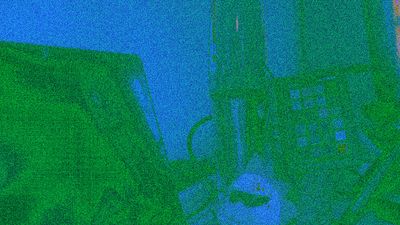
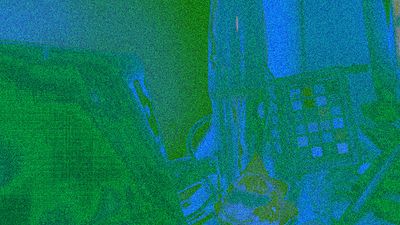
Essentially from a 2x2 sensel block on the image sensor R, G1 go into the A frame and G2, B into the B frame of a HDMI stream.
Images from the HDMI stream look like this then:
|
|
4 Post Processing Principle
Version 1 Prototype:
Notes:
- Content of single *.rgb file and *.frame sequence should - if everything worked correctly - be 100% bit identical. So *.rgb file could be deleted after *.frame sequence extraction.
5 Recorder Hardware
Basically any PC with USB3 and a fast solid state memory should work fine. So far we have tested 3 devices. The goals are in general to have an as small as possible form factor, as low as possible power consumption (as we will be operating on batteries often) but enough speed/performance to reliably capture footage (also for longer durations) and process / playback the image sequences smoothly. Obviously any recent laptop/notebook or desktop PC will work well but here we want to focus on the much smaller form factors.
5.1 Raspberry Pi 5
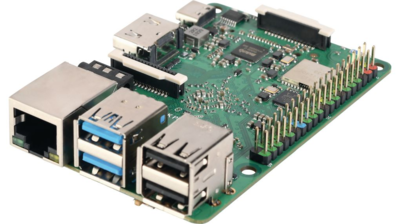
The Raspberry Pi 5 is a rather powerful but still cheap widely available single board computer. It provides 2 MIPI interfaces and a PCIe interface through flex PCB connectors.
With the Geekworm C790 Raspberry Pi HDMI CSI CSI-2 Adapter we can connect two HDMI Input interfaces to the raspberry pi and with an NVME SSD shield attach fast solid state memory to the system. We succesfully tested with the Geekworm X1002 PCIe M.2 NVMe SSD PIP PCIe Peripherie Bottom Board for Raspberry Pi 5.
We tested with Rasperry Pi OS (64bit).
5.1.1 Configuration
In /boot/firmware/config.txt
dtparam=uart0=on
dtparam=pciex1
dtparam=pciex1_gen=3 # to run NVMe SSD with Gen3 PCIe
dtoverlay=tc358743,4lane=1,cam0
dtoverlay=tc358743,4lane=1,cam1
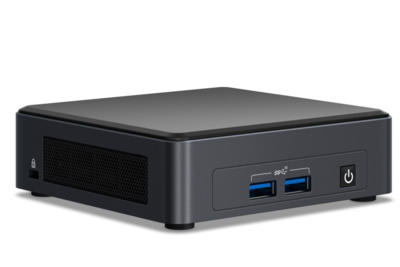
5.2 Intel NUC
recommended for AXIOM Recorder use: Yes
Tested an Intel NUC NUC7i5BNK, that's a 2017 model for around 400€
CPU: i5-7260U (Passmark 3868, TDP: 15 W)
Dimensions: approximately 4 × 4 inches (101.6 × 101.6 mm)
M.2 slot with PCIe x4 lanes
5.3 Rockpi 4 Model C
recommended for AXIOM Recorder use: No
4GB RAM (soldered)
CPU: Rockchip RK3399
Dimensions: 85 × 54mm (the smallest of the 3)
M.2 PCIe slot for SSD with four lanes PCIe 2.0
Unfortunately we could not get the M.2 SSD to perform fast enough for our purposes on the Rockpi 4 - maybe the PCIe 2.0 is the bottleneck.
Retail price: 60$
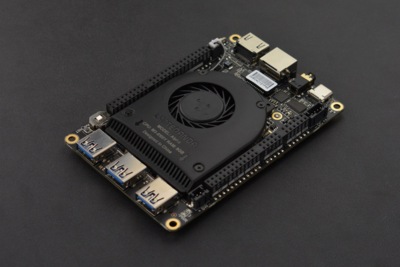
5.4 Lattepanda Alpha 864s
recommended for AXIOM Recorder use: Yes
CPU: Intel 8th m3--8100y (~4000 passmark claimed by manufacturer, TDP 15W)
8GB RAM (soldered)
Dimensions: 115 × 78 × 14 mm (2nd most compact of the 3 devices)
active cooling option is very silent, entirely passive cooling available from manufacturer
has onboard 64GB flash memory for operating system
Retail price: ~400€
5.5 LattePanda 3 Delta
Similar form factor as Lattepanda Alpha 864s and similar performance but slightly cheaper.
Dimensions: 125 x 78 x 16mm
1x M.2 M Key, PCIe 3.0 2x, Supports NVMe SSD
Retail price: $279.00
Intel® Celeron® N5105
recommended for AXIOM Recorder use: needs to be be tested.
5.6 Rock 5 Model B
Supports PCle 3.0 x4 NVMe SSD
HDMI in support up to 4K@60FPS - does this make the magewell obsolete? -> needs to be tested!
Dimensions: 100 x 72mm
Retail price: starting at ~200€ for 8GB RAM version
recommended for AXIOM Recorder use: needs to be be tested.
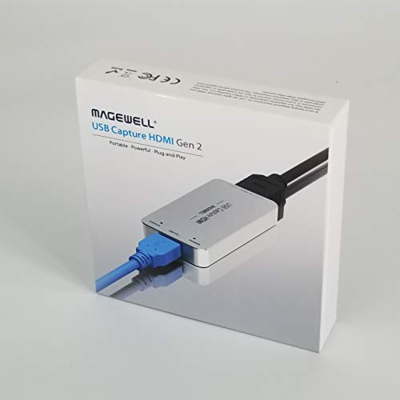
5.7 Magewell USB HDMI Gen 2
The exact model we use is called “Magewell USB Capture HDMI Gen 2” Part number: 32060. It retails for around 350-400€ and can be bought used for around 250€, we discovered offers as low as 100$ on ebay.
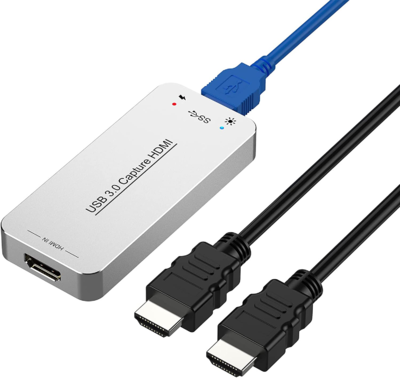
Note: there are clones (eg. on Amazon) that look almost exactly like the Magewell device and promise similar features:
We were curious and bought one. Unfortunately the electronics inside are totally different and we could not even get the device to display a HDMI signal from the AXIOM Beta so we can not recommend those.
6 Requirements and Introduction
In addition to the AXIOM Beta with 1 or 2 HDMI plugin modules you need a USB Capture HDMI Gen 2 device from Magewell: https://www.magewell.com/products/usb-capture-hdmi-gen-2 connected to the HDMI output of the AXIOM Beta.
A PC/laptop/SBC connected to the AXIOM Beta is also required (see Recorder Hardware above), all instructions here assume this PC/laptop/SBC is running Linux - other operating systems are not supported by this guide - they might work - we have not tested them.
Commands to be run on the Linux PC are indicated like:
$ command
Commands to be run on the AXIOM Beta are indicated like:
[root@beta ~]# command
6.1 AXIOM Beta firmware flashing
For a full guide about firmware flashing/backup see: Firmware Flashing
6.2 Determine Magewell Video Device ID
Install v4l2-ctl:
$ sudo apt install v4l2-ctl
Run the tool:
$ v4l2-ctl --list-devices
This should output a list, in this case telling you that the magewell device is /dev/video2 and /dev/video3 (the internal webcam is /dev/video0 and /dev/video1):
USB Capture HDMI: USB Capture H (usb-0000:00:14.0-2):
    /dev/video2
    /dev/video3

Integrated Camera: Integrated C (usb-0000:00:1a.0-1.6):
    /dev/video0
    /dev/video1
6.3 Download, Install & Run Magewell Setup Tool
This raw recording method relies on a USB HDMI capture device like the one produced by Magewell that can capture 1920x1080 at 60 FPS without any compression or image manipulation. .
download setup tool from magewell website: https://www.magewell.com/downloads/usb-capture#/tools/linux-ubuntu
run:
$ sudo usbcaptureutility
under video set:
- input color format: RGB
- input quantization: full-range
- capture color format: RGB
- capture quantization: full-range
- capture saturation: full-range
- Specific Effect: Flip
under advanced set:
- color format: only leave RGB24 on the left, move all other options to the right
- frame rate: only leave 60.00 on the left, move all other options to the right
- resolution, only leave 1920x1080 on the left, move all other options to the right
click “save to device”, disconnect and reconnect device
Settings will be stored in the device even when you disconnect it so these steps only need to be completed once.
6.4 Check Transmission Data Integrity (optional)
To test if the magewell device is receiving data from the AXIOM Beta in a reliable way (good cables are essential for example) the following method can be used:
assuming the magewell input is /dev/videoX:
using Firmware 1.0:
init raw mode on AXIOM Beta
[root@beta ~]# ./kick_manual_raw.sh
stop the acquisition with:
[root@beta ~]# fil_reg 15 0
then load a gradient overlay:
[root@beta ~]# ./mimg -T4
disable overlay:
[root@beta ~]# ./mimg -O -P0
Reset gamma and color matrix settings:
[root@beta ~]# ./mat4_conf.py 1
# ./gamma_conf.sh 1
on magewell connected pc run (assuming the magewell input is /dev/videoX):
$ ffmpeg -report -i /dev/videoX -map 0 -f framehash -hash md5 - 2>/dev/null
this should output many lines containing the hash:
ddbfb96e4b8d5191bb274885ccc0264d
then let it run for 15 minutes with (assuming the magewell input is /dev/videoX):
$ ffmpeg -report -i /dev/videoX -map 0 -f framehash -hash md5 - 2>/dev/null | grep -v ddbfb96e4b8d5191bb274885ccc0264d
no hashes should be reported, if hashes are reported this could mean a bad cable/bad connection
while the hash test is running on the camera depending on the HDMI plugin module being connected to the top plugin module slot set:
[root@beta ~]# scn_reg 31 0x5000
and then:
[root@beta ~]# scn_reg 31 0x4000
no different hashes should be reported still or the bottom plugin module slot:
[root@beta ~]# scn_reg 30 0x5000
and then:
[root@beta ~]# scn_reg 30 0x4000
no different hashes should be reported still
now stop the hash comparing line.
7 Usage Instructions
7.1 Initialize Raw Mode on AXIOM Beta
Firmware 1.0:
[root@beta ~]# ./kick_manual_raw.sh
Firmware 2.0:
[root@beta ~]# axiom_start.sh raw
7.2 Clear Overlay
Firmware 1.0:
[root@beta ~]# ./mimg -a -o -P 0
Firmware 2.0:
[root@beta ~]# axiom_mimg -a -o -P 0
7.3 Check HDMI Stream
assuming the magewell input is /dev/videoX:
$ ffplay /dev/videoX
7.4 Frame-rate Verification
on AXIOM Beta run the performance tool: Firmware 1.0:
[root@beta ~]# ./cmv_perf3
Firmware 2.0:
[root@beta ~]# axiom_perf
For 30 FPS this should output something similar to:
mapped 0x60000000+0x00400000 to 0x60000000.
mapped 0x80000000+0x00400000 to 0x80000000.
hdmi: 60.27 FPS     cseq: 29.97 FPS
If the reported FPS are lower you need to reduce the exposure time (run performance tool again afterwards to check if the changes had the desired effect):
Firmware 1.0:
[root@beta ~]# ./cmv_snap3 -e 11ms -z
Firmware 2.0:
[root@beta ~]# axiom_snap -e 11ms -z
7.5 Raw HDMI Related Commands
The first parameter of scn_reg defines which plugin module/shield slot is affected:
31 - top (North) HDMI plugin module
30 - bottom (South) HDMI plugin module
29 - HDMI Shield
set bottom HDMI plugin module to: live view:
Firmware 1.0:
[root@beta ~]# scn_reg 30 0x0000
Firmware 2.0:
[root@beta ~]# axiom_scn_reg 30 0x0000
set bottom HDMI plugin module to: A channel / A frames:
Firmware 1.0:
[root@beta ~]# scn_reg 30 0x5000
Firmware 2.0:
[root@beta ~]# axiom_scn_reg 30 0x5000
set bottom HDMI plugin module to: B channel / B frames:
Firmware 1.0:
[root@beta ~]# scn_reg 30 0x6000
Firmware 2.0:
[root@beta ~]# axiom_scn_reg 30 0x6000
set bottom HDMI plugin module to: A/B frames alternating:
Firmware 1.0:
[root@beta ~]# scn_reg 30 0x7000
Firmware 2.0:
[root@beta ~]# axiom_scn_reg 30 0x7000
activates the four corner markers (all 4 corner pixels are identical):
Firmware 1.0:
[root@beta ~]# ./raw_mark.sh
Firmware 2.0:
[root@beta ~]# axiom_raw_mark.sh
- red channel: contains 8 bit frame counter to identify A-frames (even) and B-frames (odd) and verify that no frames were dropped during transfer/capture
- green channel: wrsel buffer information (write select and read select buffers - 4 bit total) wrsel <= wbuf_sel & rbuf_sel (VHDL) split with upper/lower nibble
- blue channel: 0x55 / 85 (A-frame) and 0xAA / 170 (B-frame)
Note: Activating the corner markers is essential for post processing the captured files later so do not forget to do this.
set corner marker frame counter max to 256:
Note: This is essential for post processing the captured files later so do not forget to do this.
Firmware 1.0:
[root@beta ~]# scn_reg 2 0x100
Firmware 2.0:
[root@beta ~]# axiom_scn_reg 2 0x100
7.6 Record Raw Video with ffmpeg
$ ffmpeg -i /dev/videoX -map 0 -pix_fmt rgb24 recording.rgb
7.7 Extract Image Sequence
To extract the individual frames from a single *.rgb file after recording do:
$ split recording.rgb recording_frame_ --additional-suffix=.frame -d -b 6220800 --verbose --suffix-length=5
6220800 here corresponds to the file size in bytes of one frame (1920 x 1080 x 24bit / 8)
7.8 Corner Markers
There are 4 corner markers in a *.frame:
- red channel: contains 8 bit frame counter to identify A-frames (even) and B-frames (odd) and see if no frames were dropped during transfer/capture
- green channel: wrsel buffer information
- blue channel: 0x55 / 85 (A-frame) and 0xAA / 170 (B-frame)
Read corner marker pixel value from a *.frame file:
$ head -c 3 recording_frame_00001.frame | od -t x1
Note the order (of the hexadecimal values):
0000000 43 04 AA
        R  G  B

AA = indicates this is a B-frame in blue channel
43 = frame counter in red channel
7.9 Recover raw12 from A+B frames
We created a small tool for this called frame-merge, prerequisite, compile & install from source: https://github.com/apertus-open-source-cinema/misc-tools-utilities/tree/master/raw-via-hdmi/frame-merge
Usage to convert one A+B frame pair to a raw12:
$ frame-merge a-frame.frame b-frame.frame output.raw12
7.10 Convert raw12 to DNG
prerequisite, compile & install from source: https://github.com/apertus-open-source-cinema/misc-tools-utilities/tree/master/raw2dng
Convert a raw12 to DNG:
$ raw2dng output.raw12 --width=3840 --height=2160 --bayer-order=2
7.11 Identify skipped/double frames in raw recording
There can be several reasons for skipped frames:
- bad HDMI/USB cable
- recording media too slow
- Recorder CPU at full load or doing other stuff on the side (depends on CPU and system of course)
We created a script that can be used to show framecounter (and that way identify missing/double frames) and A/B Frame identification of all files in a folder: https://github.com/apertus-open-source-cinema/misc-tools-utilities/tree/master/raw-via-hdmi/frame-info
Usage example:
$ python3 frame-info.py -i myfolder/
Example output:
*.frame files found in folder: 698

==========================================================
filename              framecounter      A/B frame
==========================================================
...
test_frame_00077.bgr        142            A-Frame
test_frame_00078.bgr        143            B-Frame
test_frame_00079.bgr        144            A-Frame
test_frame_00080.bgr        145            B-Frame
test_frame_00081.bgr        145            B-Frame     framecounter missmatch
test_frame_00082.bgr        146            A-Frame
test_frame_00083.bgr        147            B-Frame
test_frame_00084.bgr        148            A-Frame
test_frame_00085.bgr        149            B-Frame
...
8 4096 Pixel Width Raw Mode
The HDMI signal can go up to 2048 width so with reconstructing raw data we can achieve 4096 original image sensor width that way.
This allows to get the 8 pixels black coloumns into the recorded frame and enables advanced noise compensation, make sure to enable the black coloumns first though (cmv_snap3 / axiom_snap)
In the Magewell Setup Tool (usbcaptureutility) set 2048x1080 as only resolution on the left column, then save to device and reconnect device.
On the AXIOM Beta run:
Firmware 2.0:
sudo su
memtool -1 -F 0x0 0x18000000 0x8000000
axiom_start.sh raw
axiom_gen_init_hdmi.sh 2048x1080p50 or axiom_gen_init_hdmi.sh 2048x1080p60
axiom_data_init_hdmi.sh
axiom_rmem_conf.sh 0
axiom_scn_reg 30 0x7000
axiom_raw_mark.sh
axiom_scn_reg 2 0x100
Then enable the black coloumns:
Firmware 2.0:
axiom_snap -E -b -z
To view the HDMI signal on the connected magewell run:
$ffplay -video_size 2048x1080 /dev/videoX
9 raw12 Image Viewer
We created a python based GUI (https://github.com/apertus-open-source-cinema/misc-tools-utilities/blob/hdmi-raw-2021/raw-via-hdmi/scripts/viewer.py) that can load and display raw12 preview image rather quickly. The focus here is not accurate color representation or high quality conversion but rather to quickly be able to see the content of an image. For high grade processing & conversion use the raw2dng utility (https://github.com/apertus-open-source-cinema/misc-tools-utilities/tree/master/raw2dng) instead.
Set up filetype association see Raw12_viewer
10 raw12 Sequence Playback
Installation:
sudo apt install cmake
git clone https://github.com/apertus-open-source-cinema/axiom-recorder
cd axiom-recorder
cargo build --release --all
Running:
cargo run --release ! RawDirectoryReader --file-pattern '/path/to/your/*.raw12' --bit-depth 12 --height 2160 --width 3840 --first-red-x true --first-red-y false --fps 30 ! GpuBitDepthConverter ! Debayer ! Display
11 Output Latency Tests
Tests were conducted in 24 fps mode.
Test 1: Direct HDMI output from the AXIOM Beta:
Delay is 2 frames (1 from camera internal buffering, 1 from the Monitor)
Test 2: Color HDMI output through Magewell USB3 device on Lattepanda Alpha 864S, displayed with ffplay:
Delay: 5 frames
Test 3: Raw HDMI output through Magewell USB3 device on Lattepanda Alpha 864S, displayed with live debayering in axiom-recorder software
Delay: 7 - 16 frames:

